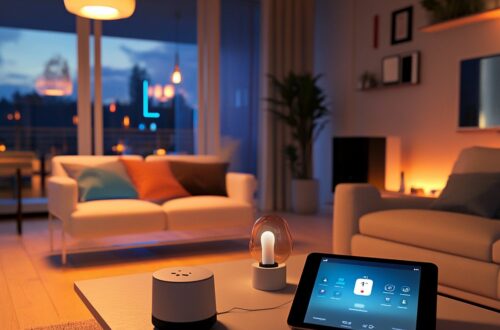
How to Choose the Right Home Security System
The average burglary lasts under ten minutes, yet most homeowners remain unprotected against this swift, invasive threat. With countless systems flooding the market, selecting the right one can feel overwhelming. This guide simplifies the process, detailing how to assess your unique vulnerabilities, compare system types, and evaluate essential features like monitoring services and smart home integration to secure your peace of mind.
Assess Your Security Needs
Start with a thorough security audit: identify all entry points (doors, windows, garage), check neighborhood crime stats via CrimeReports.com, and map your home’s layout to determine coverage zones. This process takes about an hour and gives you a clear picture of what your home security system must protect.
Walk through your entire property, both inside and out, and take notes. Look for areas where a burglar could hide, climb, or force entry. Pay attention to landscaping that blocks sightlines and outdoor lighting that may have burned out.
A proper audit prevents two common mistakes. You avoid under-buying a system with too few sensors and over-spending on equipment you do not need. Research suggests that homeowners who complete a formal audit before purchasing are more satisfied with their final setup.
Use the checklist below to guide your assessment. Answer each question honestly and use your responses to inform every subsequent decision about cameras, sensors, and monitoring services.
- How many exterior doors does your home have?
- Are any windows on the ground floor or near trees, fences, or fire escapes?
- Is your garage attached to the house or a separate structure?
- Do you have sliding glass doors or basement windows that need extra protection?
- What is your daily routine? When is the house typically empty?
Identify Vulnerable Entry Points
Check every door and window-front, back, sliding glass, and basement-for weak locks, poor lighting, or hidden access points. Bureau of Justice Statistics data indicates that 34% of burglars enter through the front door, making it your first priority for reinforcement.
Common vulnerable points include the front door, back door, sliding glass doors, ground-floor windows, and garage entry. For each of these, install specific sensors. Door sensors like the Ring Contact Sensor work well on standard entry doors, while glass break detectors are essential for sliding glass doors and large picture windows. Window sensors should be placed on every ground-floor window and any second-story window near a tree or balcony.
Perform a simple penetration test on your locks. Close each door and attempt to jiggle, kick, or pry it open. If any door gives even slightly, reinforce the strike plate with longer screws and consider adding a smart lock with a deadbolt. Poor lighting around entry points is an invitation to intruders, so add motion-activated floodlights to dark corners and side yards.
Do not forget secondary entry points like pet doors, attic hatches, and crawl space entrances. These are often overlooked during a security audit but can provide easy access for determined intruders. A motion sensor placed near these areas adds an extra layer of protection.
Consider Your Neighborhood’s Crime Rate
Use CrimeReports.com or the FBI Crime Data Explorer to check burglary rates in your area-if your rate is 20% above the national average, prioritize 24/7 monitoring. Local police websites often publish monthly crime maps that show specific incidents near your address.
Neighborhood apps like Nextdoor can also provide real-time information about suspicious activity. Residents frequently post about car break-ins, attempted break-ins, and unusual behavior. This community intelligence helps you understand the specific threats in your immediate vicinity.
If your area has a higher burglary rate, you may qualify for an insurance discount by installing a professionally monitored system. Many insurance providers offer premium reductions of 5% to 20% for homes with burglar alarms, surveillance cameras, and cellular backup. Contact your agent to confirm eligibility before purchasing equipment.
Use the risk assessment table below to match your neighborhood profile with the right security features.
| Risk Level | Neighborhood Profile | Recommended Features |
|---|---|---|
| Low | Rural, low foot traffic, few recent incidents | Basic door/window sensors, one indoor camera, self-monitoring |
| Medium | Suburban, some reported property crime | Full sensor package, 2-3 cameras, professional monitoring |
| High | Urban, frequent break-ins, proximity to commercial areas | 24/7 monitoring, cellular backup, 4+ cameras, glass break detectors, flood sensors |
Evaluate Your Home’s Size and Layout
Measure your home’s square footage and sketch a floor plan-homes over 2,500 sq ft typically need 4-6 cameras and 15-20 sensors. A 2,000 sq ft home generally requires 3-4 cameras and 10-15 sensors, but your layout may change these numbers.
Open floor plans need cameras with a wider field of view to cover large combined spaces like a kitchen, dining, and living area. Multi-story homes require cameras on each level, with particular attention to stairways and landings. A pan-tilt-zoom camera works well for covering large open areas because it can be repositioned remotely.
Wireless systems are easier to expand if you add rooms or outbuildings later. You can simply add another sensor or camera without running new cables. However, wired systems offer more reliable connections for large homes where Wi-Fi signal strength may be inconsistent. Consider a hybrid approach: wired for main living areas and wireless for garages, basements, or sheds.
Draw your floor plan on graph paper and mark each window, door, and hallway. Place cameras at choke points where an intruder must pass to move between rooms. Install motion sensors in high-traffic hallways and the main living area, but avoid placing them near heating vents or windows where false alarms are common.
Understand the Main Types of Security Systems
Decide between DIY (e.g., Ring, SimpliSafe) and professional installation (e.g., ADT, Vivint). DIY saves $200-$500 upfront but requires 2-4 hours of setup. This is often the first major fork in the road for most homeowners.
Beyond installation, you must also consider how your system connects and who responds to alarms. The three main categories are DIY vs. professional, wired vs. wireless, and monitored vs. unmonitored. These choices determine your upfront cost, monthly fees, and overall reliability.
Your decision should factor in your technical comfort level and your budget. A basic DIY equipment package typically costs $200-$500, while professional systems start around $600. Understanding these trade-offs early prevents costly mistakes later.
Take time to assess your home’s layout and your family’s routine. The right home security system should fit your lifestyle, not complicate it. Start by exploring each category below to see which combination works best for you.
Professionally Installed vs. DIY Systems
Compare ADT (professional, ~$99 installation fee, $36.99/mo monitoring) with Ring or SimpliSafe (DIY, no installation fee, $20/mo monitoring). The table below highlights the key differences between these two popular approaches.
| Feature | Professional (ADT, Vivint) | DIY (Ring, SimpliSafe) |
|---|---|---|
| Installation fee | $99-$199 | $0 |
| Setup time | 2-4 hours (technician) | 30 min to 2 hours |
| Equipment cost | $600+ | $200-$500 |
| Monthly fee | $36.99-$60 | $20-$30 |
| Best for | Large homes, less tech-savvy users | Renters, budget-conscious buyers |
Professional installation offers expert setup, guaranteed placement, and ongoing customer support. However, these systems often lock you into long contracts, typically 36 months. If you move frequently or dislike commitments, this can be a major drawback.
DIY systems provide flexibility and lower upfront costs. You can install sensors and cameras at your own pace without scheduling appointments. DIY systems are also easier to move and expand as your needs change. You simply unplug the hub and take it with you.
Consider your willingness to troubleshoot technical issues on your own. Professionals handle everything for you, while DIY requires some self-reliance. For renters or those in temporary housing, DIY offers a practical, contract-free solution.
Wired vs. Wireless Systems
Wireless systems (e.g., Ring, Arlo) offer easy installation and battery life of 3-6 months, but wired systems (e.g., Honeywell) provide stable 24/7 power and no Wi-Fi dependency. This is a fundamental choice that affects reliability and maintenance.
Wireless pros include simple setup, easy expandability, and battery backup during outages. You can place cameras and sensors almost anywhere without running cables. However, wireless systems are vulnerable to Wi-Fi interference and require regular battery changes. Dead zones in your home can also weaken signal strength.
Wired systems offer rock-solid reliability with no interference from neighboring networks. They never need battery replacements and provide consistent power. The downside is installation complexity, often requiring drilling and running cables through walls. Wired systems are also less flexible if you want to relocate components later.
Consider specific examples to guide your choice. The Ring Stick Up Cam is a popular wireless option, while the Nest Cam IQ represents a wired approach. If you experience Wi-Fi dead zones, experts recommend investing in a mesh network to strengthen your signal before going fully wireless.
Your home’s construction matters too. Thick walls and large layouts can block wireless signals. For critical entry points like doors and windows, wired sensors offer unmatched stability. Many homeowners choose a hybrid approach for the best of both worlds.
Monitored vs. Unmonitored Systems
Professional monitoring (e.g., ADT, SimpliSafe) costs $15-$40/mo and provides 24/7 response, while self-monitoring via app alerts is free but relies on you to react. This decision impacts how quickly help arrives during an emergency.
With professional monitoring, trained agents watch your system around the clock. When an alarm triggers, the monitoring center verifies the alert and contacts emergency services. Average response time is 30-45 seconds from alarm to dispatch. This rapid action can be critical during a break-in or fire.
Companies like COPS Monitoring operate redundant centers to ensure reliability. Professional monitoring also includes police dispatch and sometimes fire or medical response. Many insurance providers offer discounts on homeowners policies for monitored systems, which can offset the monthly cost.
Self-monitoring costs $0 per month but requires you to be vigilant. You receive push notifications on your mobile app when sensors trigger, but you must check alerts and call authorities yourself. The risk is missing alerts while you are asleep, at work, or away. False alarms can also lead to alert fatigue, making you less responsive over time.
For busy families or frequent travelers, professional monitoring offers peace of mind. For budget-conscious users who are always near their phones, self-monitoring can work. Consider your daily routine and how quickly you can respond to an emergency before choosing.
Key Features to Look For
Focus on four critical features when comparing systems: camera resolution (1080p minimum), field of view (120 degrees or wider), motion detection with pet immunity, and app control for iOS and Android. These elements determine how clearly you see events, how well the system avoids false alarms, and how conveniently you manage daily operations.
A home security system is only as effective as its weakest component. A surveillance camera with poor resolution misses facial details, while a motion sensor that triggers on every passing car becomes a nuisance. The right combination of hardware and software creates a reliable barrier around your property.
Before comparing brands, assess your specific needs. A small apartment requires different coverage than a two-story house with a large backyard. Start with these core features, then expand with extras like glass break detectors or flood sensors as your budget allows.
Camera Resolution and Field of View
Choose 1080p resolution for clear identification (e.g., Arlo Pro 4) and a 130 degrees to 160 degrees field of view to cover wide areas. 4K is overkill for most homes and consumes significant bandwidth and storage space. For standard rooms and entry points, Full HD provides sharp images that help identify faces and license plates.
| Camera Model | Resolution | Field of View | Best For |
|---|---|---|---|
| Arlo Pro 4 | 2K | 160 degrees | Large yards, driveways |
| Ring Stick Up | 1080p | 130 degrees | Indoor rooms, porches |
| Nest Cam | 1080p | 130 degrees | General purpose |
Field of view determines how much area a single camera captures. A 120 degrees to 160 degrees lens works well for most rooms, while 180 degrees suits corner installations. For driveways, choose a narrower field of view to reduce false triggers from passing cars and pedestrians on the sidewalk.
Night vision matters for 24/7 protection. Most quality cameras include infrared LEDs with a range up to 30 feet. Check the night vision range matches your coverage area, especially for outdoor cameras monitoring dark corners or long driveways.
Motion Sensors and Detection Accuracy
Look for sensors with pet immunity (e.g., SimpliSafe’s motion sensor ignores pets under 50 lbs) and adjustable detection zones to reduce false alarms. Passive infrared (PIR) technology detects heat signatures from humans and animals, triggering alerts when temperature changes occur within the detection area.
Key features to evaluate include detection range (typically 20 to 40 feet), adjustable sensitivity settings, and pet immunity thresholds. The SimpliSafe Motion Sensor sells around $29.99, while the Ring Motion Detector costs about $19.99. Both offer reliable performance for standard home layouts.
Research suggests that a large portion of alarm calls turn out to be false alarms. To minimize these disruptions, position sensors away from heating vents, windows with direct sunlight, and areas with moving curtains. Use pet-immune models if you have cats or small dogs that roam freely during the day.
Consider combining motion sensors with door sensors and window sensors for layered protection. This approach verifies an intruder’s presence through multiple triggers before sounding the siren or contacting the monitoring service.
Mobile App Control and Smart Home Integration
Ensure the system works with Alexa and Google Assistant (e.g., Ring app integrates with both) and supports IFTTT for custom automation rules like turning on lights when motion is detected. Top apps include Ring, SimpliSafe, Arlo, and Nest, each offering distinct strengths in interface design and feature sets.
Look for these app capabilities: push notifications with image previews, geofencing that arms or disarms based on your phone’s location, remote arming and disarming, and guest access for trusted visitors. A good mobile app turns your phone into a complete control panel for the entire system.
Smart home integration extends beyond basic voice commands. With Alexa compatibility, you can say “Alexa, arm the system” before leaving. Google Assistant offers similar functionality. IFTTT enables custom automation rules, such as turning on smart lights when a door sensor opens or sending a notification when the garage door activates.
Verify app compatibility with your specific phone model and operating system version. Some manufacturers prioritize iOS over Android, or vice versa. Check user reviews for real-world feedback on app stability, notification speed, and ease of use before committing to a system.
Two-Way Audio and Video Doorbells
Video doorbells like Ring Video Doorbell Pro 2 ($229.99) offer two-way audio, 1536p HD, and a 150 degrees field of view, ideal for seeing and speaking to visitors. This combination lets you answer the door from anywhere without opening it. Two-way audio transforms a passive camera into an active communication tool for your home security system.
Beyond conversation, this feature serves a practical purpose for package security. When a courier arrives, you can instruct them to leave a parcel in a safe spot or ask them to wait. Many models also include pre-recorded quick replies so you can respond with a single tap when you cannot talk. This deters porch pirates by making your home seem occupied and attentive.
Key specifications to compare include video resolution, field of view, night vision, and motion detection range. Look for at least 1080p resolution for clear identification of faces and package details. A wider field of view, around 150 degrees, covers more of your porch and walkway. Good night vision ensures the camera remains effective after dark, and adjustable motion zones reduce false alerts from passing cars.
Top models include the Ring Pro 2, Nest Doorbell, and Arlo Video Doorbell, each with distinct strengths. The Nest Doorbell integrates tightly with Google Assistant, while Arlo offers excellent color night vision and no subscription for basic clips. Package detection is a standout feature across these units, alerting you specifically when a box is left or removed. Privacy zones let you block out areas like a neighbor’s window, and a privacy shutter on indoor cameras ensures the lens is covered when not in use.
Consider a common scenario: a delivery driver rings your bell while you are at work. You open the mobile app, see the driver on the live stream, and use two-way audio to say, “Please leave it behind the planter.” The driver acknowledges and places the package out of sight. You then receive a push notification confirming the delivery, all without a single missed step or a stolen box.
Consider Equipment and Sensor Options
Build your system with a mix of sensors: door/window sensors ($10-$20 each), cameras ($50-$200), and environmental sensors ($30-$50) for full coverage. A well-rounded home security system combines these three categories to protect against burglary, fire, and water damage.
Most basic kits include 2-3 door sensors and 1 camera, but you can expand from there. Start with the essentials and add more sensors as your budget allows.
Think of your home in zones. Ground-floor entry points need door and window sensors, common areas benefit from cameras, and utility spaces need environmental monitoring. This layered approach gives you complete protection without overspending.
Consider how each sensor type communicates with your control panel. Most modern systems use wireless security protocols, which makes installation simple and allows for easy expansion later.
Door and Window Sensors
Install door sensors (e.g., Ring Contact Sensor, $19.99) and window sensors (e.g., SimpliSafe Window Sensor, $14.99) with adjustable entry/exit delays. These devices use a magnetic contact mechanism with two pieces: one on the door or window frame, the other on the moving part.
When the magnetic connection breaks, the sensor triggers an alarm. This simple design is highly reliable and works on any entry point. Entry delay gives you time to disarm the system when you come home, while exit delay lets you leave without setting off the alarm.
Look for tamper detection features that alert you if someone tries to remove the sensor. Wyze Sense offers a budget-friendly option at around $20 for a starter kit with two entry sensors.
| Sensor Model | Price | Battery Life | Range |
|---|---|---|---|
| Ring Contact Sensor | $19.99 | 3+ years | Up to 250 ft |
| SimpliSafe Entry Sensor | $14.99 | 5+ years | Up to 400 ft |
| Wyze Sense | $19.99 (2-pack) | 1-2 years | Up to 100 ft |
These sensors are wireless and install with adhesive strips in about 5 minutes. No drilling or wiring required. Place sensors on all ground-floor doors and windows, plus any second-story windows accessible from a roof or tree.
Indoor and Outdoor Cameras
Choose indoor cameras like Wyze Cam v3 ($35.99) for 1080p and pan-tilt-zoom, and outdoor cameras like Arlo Pro 4 ($199.99) with IP65 weatherproofing and night vision. Your surveillance camera choices depend on where you need coverage and what features matter most.
Indoor cameras focus on monitoring activity inside your home. Look for features like two-way audio to talk to family members or pets, and privacy shutters that physically block the lens when you want privacy. Google Nest Cam offers excellent integration with smart home platforms.
Outdoor cameras must withstand weather conditions. The IP rating tells you how well they resist dust and water. An IP65 rating means full dust protection and water resistance against jets. Mount outdoor cameras at 8-10 feet high to get a clear view of faces while keeping the camera out of reach.
| Camera Model | Price | Field of View | Key Features |
|---|---|---|---|
| Wyze Cam v3 | $35.99 | 130 degrees | 1080p, night vision, pan-tilt |
| Google Nest Cam | $99.99 | 135 degrees | HDR, intelligent alerts |
| Ring Floodlight Cam | $169.99 | 140 degrees | Motion lights, siren, 1080p |
| Arlo Pro 4 | $199.99 | 160 degrees | 2K HDR, color night vision |
Consider storage options carefully. Cloud storage requires a subscription, while local storage via microSD cards has no monthly fee. Cameras with high resolution capture more detail but require more bandwidth and storage space.
Environmental Sensors (Smoke, Flood, Carbon Monoxide)
Add environmental sensors like SimpliSafe’s Smoke Detector ($29.99), Water Sensor ($19.99), and Carbon Monoxide Detector ($29.99) to detect non-burglary emergencies. These devices protect your home from threats that have nothing to do with intruders.
Smoke detectors in a security system work like standard smoke alarms but connect to your monitoring service. When triggered, the monitoring center can dispatch the fire department even if you are not home. Some systems offer a Smoke/CO Listener that connects to your existing detectors.
Flood sensors detect water leaks before they cause major damage. Place them near water heaters, sump pumps, washing machines, and under sinks. A single water sensor can save you thousands in water damage costs by alerting you to leaks early.
| Sensor Type | Price | Detection Method |
|---|---|---|
| Smoke Detector | $29.99 | Photoelectric and ionization |
| Water Sensor | $19.99 | Moisture contact probes |
| CO Detector | $29.99 | Electrochemical sensor |
Carbon monoxide detectors are required by law in many states. CO is an odorless, colorless gas that can be fatal, making these sensors essential for any home with gas appliances or attached garages. Integration with your security system means you get alerts via app and through your monitoring center, even when you are away from home.
Evaluate Monitoring Services and Contracts
Compare monitoring costs before you buy. ADT charges $36.99/mo with a 36-month contract, while SimpliSafe offers $14.99/mo with no contract. Response times for professional centers average 30 seconds, which matters during an actual emergency.
Your choice comes down to three areas: professional monitoring, contract terms, and self-monitoring. Each option affects your monthly budget and your level of control. Professional monitoring fees range from $10 to $40 per month, while contracts can lock you in for 12 to 36 months.
Think about your lifestyle and how much hands-on involvement you want. A busy household may prefer full professional coverage. A tech-savvy owner might enjoy the flexibility of self-monitoring through a mobile app.
Professional Monitoring Costs and Response Times
Professional monitoring costs $14.99 to $39.99/mo, with SimpliSafe at $14.99 and ADT at $36.99. Average response times run 30 to 45 seconds to answer and about 5 minutes to dispatch authorities. UL-certified stations are preferred because they meet strict industry standards for reliability.
Here is how the system works: a motion sensor or door sensor triggers the alarm, then a signal travels to a central station. An operator contacts the homeowner to verify the threat and dispatches police if needed. This process requires cellular backup, often sold as an add-on for $5 to $10 per month.
| Provider | Monthly Fee | Contract |
|---|---|---|
| ADT | $36.99 | 36 months |
| Vivint | $39.99 | Varies |
| SimpliSafe | $14.99 | None |
| Ring | $20.00 | None |
Consider what you get for the price. Higher fees often include cellular backup, video verification, and smart home integration. Lower fees may still offer solid coverage but with fewer extras. Always confirm whether the monitoring fee includes cellular backup or if that is a separate charge.
Contract Length and Early Termination Fees
Avoid long contracts. ADT requires 36 months with early termination fees up to $450, while SimpliSafe and Ring offer no-contract options. Vivint can extend to 60 months with a $500 ETF, so read every line before signing.
Contract structures vary widely across providers. Standard terms run 12 to 36 months, and many include auto-renewal clauses that keep you enrolled after the initial period. Watch for price increases after year one, a common practice that can raise your monthly bill unexpectedly.
| Provider | Contract Length | Early Termination Fee |
|---|---|---|
| ADT | 36 months | $450 |
| Vivint | 60 months | $500 |
| SimpliSafe | None | $0 |
| Ring | None | $0 |
Some companies offer money-back guarantees within 30 days, which gives you a trial period. Look for flexible terms if you plan to move or change systems. A no-contract plan lets you cancel anytime without penalty, though you may lose access to certain features.
Self-Monitoring Options and Alerts
Self-monitor with Ring or SimpliSafe: get instant push notifications and watch live streams via the app, but you must respond yourself, no police dispatch. This option costs less or nothing monthly, making it attractive for budget-conscious homeowners.
Key features include geofencing, which auto-arms your system when you leave, plus guest access for visitors and event history logs. The mobile app lets you view live footage from indoor cameras and outdoor cameras, control smart locks, and adjust arming modes. Two-way audio allows you to speak through a video doorbell or surveillance camera.
- Geofencing arms and disarms based on your phone location
- Guest access gives temporary codes to visitors or service workers
- Event history shows time-stamped alerts and video clips
Weigh the pros and cons carefully. Self-monitoring saves money but relies on your attention and quick reaction. Some insurance companies require professional monitoring for discounts, so check with your provider. Set up multiple user accounts for family members so everyone stays informed during an emergency.
Compare Costs and Budget
Budget $200-$500 for DIY equipment (e.g., Ring kit $199.99) plus $20/mo monitoring, or $600-$1,000 upfront for professional systems with $36/mo fees. Your total first-year cost can range from roughly $400 for a basic DIY setup to $1,500 or more for a professionally installed system. The right choice depends on your budget, your comfort with installation, and the level of protection you need.
Before you compare brands, it helps to break down the three main cost categories. You have upfront equipment costs, monthly fees for monitoring and cloud storage, and potential savings from insurance discounts. Each category plays a role in your total cost of ownership over the first year and beyond.
Keep in mind that the cheapest upfront option is not always the most affordable over time. A low-cost DIY system with high monthly fees can cost more than a professional system with a lower monitoring rate. Take a few minutes to calculate your total first-year cost for each option you are considering.
Upfront Equipment Costs
DIY equipment costs $150-$400 (e.g., SimpliSafe 8-piece kit $244.96) vs. professional systems $600-$1,500 (e.g., ADT starting at $599). The price difference reflects the hardware quality, the number of sensors included, and the level of installation support you receive. DIY kits are designed for quick setup, while professional systems often include more advanced equipment and a technician who handles the wiring.
Here is a quick comparison of popular systems and what you get for your money:
| Brand | Starter Kit Price | Equipment Included |
|---|---|---|
| Ring | $199.99 | Base station, keypad, motion sensor, door/window sensor, range extender |
| SimpliSafe | $244.96 | Base station, keypad, entry sensor, motion sensor, panic button |
| Wyze | $49.99 | Base station, door/window sensor, motion sensor, keypad |
| ADT | $599+ | Control panel, door/window sensors, motion sensor, key fob |
| Vivint | $599+ | Smart hub, door/window sensors, motion sensor, smart lock |
Professional installation may be free during promotions, or it can cost $99-$200 depending on the complexity of the setup. Most systems come with a 1-3 year warranty on the equipment. Check for bundle deals that include cameras and sensors, since buying components separately often costs more.
Monthly Fees and Hidden Charges
Watch for hidden charges: activation fees ($50-$100), equipment rental ($10/mo), and cloud storage add-ons ($3-$10/mo). These extra costs can add up quickly and turn an affordable system into an expensive one. Always ask for a full quote in writing before you commit to any monitoring service.
Common monthly fees include:
- Monitoring fee: $14.99-$39.99 per month for professional monitoring
- Cloud storage: Ring charges $3.99/mo, Arlo charges $9.99/mo for video history
- Cellular backup: $5-$10/mo for systems that use cellular instead of Wi-Fi
- Equipment rental: Some companies charge $10/mo for the hardware itself
Here is a comparison of total first-year costs for top brands:
| Brand | Equipment Cost | Annual Monitoring | Total First Year |
|---|---|---|---|
| Ring | $199 | $60 | $259 |
| SimpliSafe | $244 | $180 | $424 |
| ADT | $599 | $444 | $1,043 |
Be aware that many companies raise their monitoring prices after the first contract year. Some also charge early termination fees if you cancel before the contract ends. Ask about price increases and contract length before you sign anything.
Insurance Discounts and Potential Savings
Many insurers offer 5%-20% discounts for monitored systems (e.g., State Farm gives up to 20% off homeowners insurance for UL-listed systems). Allstate offers up to 15% and Nationwide up to 10% for professionally monitored security. These discounts can significantly offset your monthly monitoring costs.
Insurance companies typically require that your system includes UL certification or professional monitoring to qualify for the discount. DIY systems may not qualify unless they are professionally monitored and meet the insurer’s standards. Check with your agent to confirm the specific requirements for your policy.
Here is how the math works: if your annual premium is $1,200, a 15% discount saves you $180 per year. That savings alone can cover several months of monitoring fees. Over the life of your system, the discount could save you more than the cost of the equipment itself.
Document your system’s certification and keep receipts in case your insurer asks for proof. Ask your agent whether a video doorbell, burglar alarm, or surveillance camera qualifies for an additional discount. Some insurers also offer lower rates for systems with smoke detectors, carbon monoxide detectors, or flood sensors connected to the main control panel.
Check Installation and Setup Requirements
Professional installation takes 2-4 hours and costs $99-$200, while DIY systems (e.g., Ring) can be set up in 30-60 minutes with basic tools. This decision often comes down to your comfort level with technology and the complexity of your chosen home security system.
Wired security systems typically require a professional touch because they involve running cables through walls and ceilings. Wireless security systems, on the other hand, communicate over Wi-Fi and use battery-powered sensors that you can place yourself.
Consider your long-term plans before choosing. A professionally installed system may offer a cleaner look, but a DIY setup gives you the freedom to move sensors and cameras whenever you want. Your budget and time constraints will play a major role in this choice.
Professional Installation Process
Professionals mount sensors, run wires, and configure your system, expect a 2-4 hour visit (e.g., ADT’s technician will also test all devices). The technician starts by assessing your home’s layout and identifying vulnerable entry points like doors and ground-floor windows.
Next, they mount the control panel, door sensors, window sensors, and any surveillance cameras. For wired security systems, this step may require drilling into drywall and running cables through the attic or basement. Some installations require a second visit if the wiring is complex or if additional equipment needs to be ordered.
After mounting, the technician connects your system to the monitoring service and verifies that the cellular backup is active. They will also walk you through the mobile app and show you how to arm and disarm the system. Network requirements matter here, so ensure your router provides strong Wi-Fi coverage or a hardwired ethernet connection for the control panel. Providers like ADT and Vivint offer this service, with costs typically ranging from $99 to $200.
DIY Installation Difficulty and Time
DIY installation (e.g., SimpliSafe, Ring) takes 30-60 minutes with only a screwdriver and drill, most sensors stick with adhesive strips. This approach is ideal for renters or homeowners who want to avoid drilling holes and running cables.
Follow this simple step-by-step process for a smooth setup:
- Unbox all devices and charge cameras or sensors that have rechargeable batteries.
- Place door sensors and window sensors using adhesive strips or screws, depending on your preference.
- Mount outdoor cameras at 8-10 ft height for the best field of view and to keep them out of reach.
- Connect each device to your Wi-Fi network through the mobile app.
- Test every sensor and camera to confirm they trigger alerts correctly.
You will need a few basic tools: a screwdriver, a drill, a level, and a ladder. The difficulty is easy for wireless security systems, but it becomes moderate if you choose wired cameras that require running cables. Use a level to ensure cameras are straight, which improves the video quality and detection zone accuracy.
Here is a realistic time breakdown for each step:
| Setup Step | Estimated Time |
|---|---|
| Unboxing and charging | 10-15 minutes |
| Placing sensors | 10-15 minutes |
| Mounting cameras | 15-20 minutes |
| Connecting to Wi-Fi | 5-10 minutes |
| Testing all devices | 5-10 minutes |
DIY systems also offer easy scalability. You can add a video doorbell, smart lock, or motion sensor later without needing a technician. Just make sure your Wi-Fi signal reaches every corner of your home, as weak connectivity can cause false alarms or delayed notifications.
Review Customer Support and Reputation
Check warranty length (1-3 years) and read user reviews on Trustpilot. ADT averages 4.1 stars, but SimpliSafe has 4.5 stars for support. These factors reveal how a company treats you after the sale, not just during it.
A home security system is a long-term investment. You need to know that your monitoring service will answer calls quickly and that your equipment will be replaced if it fails. Poor support can turn a minor issue into a major headache.
Reputation also tells you about reliability. Brands with consistent positive feedback tend to have fewer false alarms and better response time from their call centers. Look for patterns in reviews rather than focusing on single complaints.
Take time to compare warranties, return policies, and customer ratings side by side. This research prevents buyer’s remorse and ensures you pick a provider that stands behind its products.
Warranty and Return Policies
Most systems offer 1-year warranties (e.g., Ring) or 3-year (e.g., SimpliSafe), with 30-day money-back guarantees. The warranty covers parts and labor for indoor cameras, door sensors, motion sensors, and other hardware. Labor coverage matters if you choose professional installation.
ADT provides a 90-day money-back period, which is longer than most competitors. However, their equipment warranty may require professional installation to remain valid. DIY setups sometimes void coverage if you install components incorrectly.
Read the fine print about what is excluded. Battery life, power outage damage, and tamper proof features are usually covered, but accidental damage is not. Some companies offer extended warranties at an extra cost, which can be worthwhile for expensive pan-tilt-zoom cameras.
Keep your receipts and register your product after purchase. This simple step speeds up claims and ensures you receive firmware updates and recall notices.
| Brand | Warranty | Return Policy |
|---|---|---|
| Ring | 1 year | 30 days |
| SimpliSafe | 3 years | 60 days |
| ADT | 1 year | 90 days |
| Vivint | 1 year | 30 days |
Customer Reviews and Ratings
Read reviews on Trustpilot and Consumer Reports. SimpliSafe scores 4.5/5 for ease of use, while ADT scores 4.1/5 for professional monitoring. These platforms aggregate thousands of verified experiences, giving you a realistic picture of customer support quality.
Google Reviews also provides local insights about installation teams and response time in your area. Look for feedback from verified purchasers and check the dates. A review from two years ago may not reflect current monitoring fee structures or app quality.
Common complaints across brands include false alarms from pet immunity sensors and long wait times for phone support. Some users report issues with cloud storage subscriptions being hard to cancel. Others mention Wi-Fi connectivity problems with wireless security cameras.
Brand reputation matters for long-term reliability. Companies with strong ratings tend to provide better encryption standards like AES-256 and more frequent app compatibility updates. They also respond faster to security audit findings or data privacy concerns.
Compare ratings across multiple platforms before deciding. A brand with 4.5 stars on Trustpilot but 2 stars on Consumer Reports may have issues with subscription cost transparency. Balance the positives against the negatives to find a system that fits your needs.
Make Your Final Decision
Now compare your top choices side-by-side, create a shortlist of 2-3 systems (e.g., Ring, SimpliSafe, ADT) and test them if possible. This final step is where you weigh everything you have learned about each home security system.
Start by reviewing your notes on equipment costs, monthly monitoring fees, and contract lengths. Look at user reviews to see what real customers say about reliability and customer support. Pay close attention to any recurring complaints about false alarms or poor app performance.
Think about your specific living situation. Renters often prefer wireless security with DIY installation, while homeowners may invest in a wired system with professional monitoring. Your budget, technical comfort level, and long-term plans all play a role in this decision.
Remember that the cheapest option is not always the best value. A system that costs more upfront but has lower monthly fees and better equipment could save you money over time. Take a moment to calculate the total cost of ownership for each system over a few years.
Compare Top Brands Side-by-Side
Create a comparison table with Ring (DIY, $199+, $20/mo), SimpliSafe (DIY, $244+, $14.99/mo), ADT (Professional, $599+, $36.99/mo), and Vivint (Professional, $599+, $39.99/mo). This quick reference helps you spot the differences at a glance.
| Brand | Installation | Equipment Cost | Monthly Fee | Contract | Key Features | Rating |
|---|---|---|---|---|---|---|
| Ring | DIY | $199+ | $20/mo | None | Alexa compatibility, video doorbell, affordable | Best for budget |
| SimpliSafe | DIY | $244+ | $14.99/mo | None | No contract, flexible plans, easy setup | Best for flexibility |
| ADT | Professional | $599+ | $36.99/mo | Yes | UL-certified, 24/7 monitoring, trusted brand | Best for reliability |
| Vivint | Professional | $599+ | $39.99/mo | Yes | Smart home integration, advanced automation | Best for smart homes |
Ring stands out for budget-conscious buyers who want a solid video doorbell and basic sensors. SimpliSafe offers the most flexibility with no contract and affordable monitoring, making it ideal for renters or those who move often.
ADT brings decades of experience and UL certification, which matters if you want a proven professional monitoring service. Vivint excels at smart home integration, letting you control lights, locks, and thermostats alongside your burglar alarm.
Consider scalability and expandability when comparing brands. Look for systems that allow you to add outdoor cameras, glass break detectors, flood sensors, or carbon monoxide detectors later. A modular system grows with your needs without forcing you to replace everything.
Test the System Before Committing
Take advantage of trial periods, Ring offers 30-day returns, SimpliSafe offers 60-day money-back, and ADT offers 6-month trial. Testing a system in your actual home is the best way to know if it fits your lifestyle.
Order a starter kit and install it yourself, even if you plan to use professional installation later. Use the system for at least a week to get a real feel for daily operation. Set up the mobile app, test push notifications, and practice arming and disarming the system.
Create a checklist to guide your testing. Walk through every room to test all sensors, including door sensors, window sensors, and motion detectors. Verify that the app sends alerts promptly and that two-way audio works clearly. Try the siren to check its loudness and test the entry delay and exit delay settings.
Simulate a break-in to see how the system responds. Have a friend enter through a door or window while the system is armed. Check how quickly you receive a notification and whether the monitoring service contacts you. This hands-on test reveals weaknesses that spec sheets cannot show.
Pay attention to battery life on wireless sensors and cameras. Check the video quality of indoor and outdoor cameras during both day and night. Test night vision, field of view, and resolution to ensure you can identify faces and license plates. Testing now helps you avoid long-term commitment mistakes and ensures you choose a home security system that truly protects your property.